
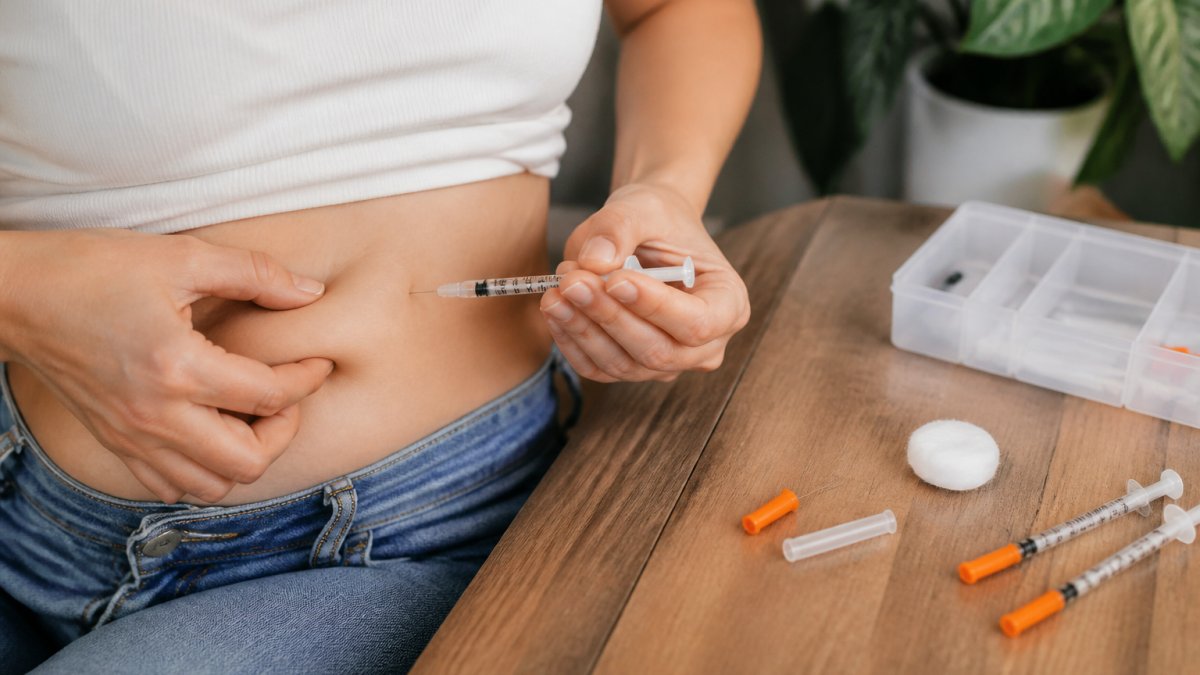
 how-to
How to Properly Rotate Injection Sites for Comfort
Table of Contents
- What You'll Need Before You Start
- What Is Injection Site Rotation and Why It Matters for Comfort
- Recommended Body Areas for Subcutaneous Injections
- Step-by-Step: How to Properly Rotate Injection Sites for Comfort
- Lipohypertrophy Prevention: Spotting and Avoiding Site Overuse
- How to Reduce Injection Pain: Technique, Needle Gauge, and Timing
- Injection Site Rotation Chart: Building Your Personal Schedule
- Common Mistakes That Undermine Site Rotation
- Frequently Asked Questions
Last Updated: September 28, 2026
What You'll Need Before You Start
Gather these basics before your first injection.
- Alcohol swabs for cleaning the skin
- A sharps container for used needles
- Your prescribed medication and syringes
- A notebook or phone app to track sites
- A rotation chart you can mark up
Wash your hands with soap and water first. Pick a clean, well-lit spot where you can see your skin clearly.
What Is Injection Site Rotation and Why It Matters for Comfort
Injection site rotation means changing where you place each shot so no single spot gets used too often, one of the simplest ways to keep injections comfortable over time.
How Subcutaneous Tissue Responds to Repeated Needle Trauma
Subcutaneous tissue is forgiving but not unlimited. Stick the same spot day after day and the body responds with inflammation and scarring.
Recommended Body Areas for Subcutaneous Injections
Four main areas work well for subcutaneous shots. Each has trade-offs in comfort, ease, and absorption.
- Abdomen: Easy to see and reach. Avoid the area within about two inches of your navel.
- Thigh: Good for self-injection. The outer and front areas work best.
- Upper arm: Convenient but harder to reach alone. Often needs a helper.
- Buttock: Comfortable for many people. Harder to see, so use a mirror or a partner.
Abdomen, Thigh, Upper Arm, and Buttock: Pros and Cons
| Area | Comfort | Ease of Self-Injection | Absorption Speed |
|---|---|---|---|
| Abdomen | High | Easy | Fastest |
| Thigh | Medium | Easy | Moderate |
| Upper arm | Medium | Hard alone | Moderate |
| Buttock | High | Hard alone | Slowest |
The abdominal wall is most popular because it is easy to see, easy to reach, and absorbs quickly. Thigh injections are a close second for solo injectors.
Step-by-Step: How to Properly Rotate Injection Sites for Comfort
This routine keeps injections comfortable and tissue healthy.
- Pick your main area for the week, such as the abdomen.
- Divide the area into quadrants using your navel as the center point.
- Choose one quadrant and inject at the outer edge.
- Move to the next spot at least one finger-width away.
- Work through the quadrant in a clockwise rotation pattern.
- Move to the next quadrant once you finish the first.
- Log each site in your notebook or app.
- Switch main areas the following week.
This systematic pattern means you never guess where the next shot goes.
Using a Systematic Pattern and Clockwise Rotation
Clockwise rotation is easiest to remember: picture a clock face over your chosen area, start at 12, then move to 3, 6, and 9, each number a new spot.
Lipohypertrophy Prevention: Spotting and Avoiding Site Overuse
Lipohypertrophy is the buildup of firm, fatty lumps under the skin from repeated injections in one spot, the single biggest reason rotation matters.
Signs to watch for:
- Firm lumps that do not go away
- Dimpled or dented skin
- Areas that feel different from nearby tissue
- Bruising that lingers longer than usual
How to Reduce Injection Pain: Technique, Needle Gauge, and Timing
Pain at the injection site comes down to four things: needle choice, technique, timing, and the condition of the tissue.
Needle Gauge and Length
A finer needle gauge means a thinner needle and often less discomfort. Gauge numbers work backward: 31-gauge is thinner than 29-gauge. Many insulin pen needles now come in 31-, 32-, and 33-gauge sizes, with 4 mm and 5 mm lengths common for subcutaneous injections.
Technique That Reduces Discomfort
- Let the alcohol swab dry completely. Injecting into wet skin stings because the alcohol is still evaporating into the puncture.
- Use a 90-degree angle for most subcutaneous shots with a short needle. If you are very thin or using a longer needle, your clinician may recommend a 45-degree angle or a lifted skin fold.
- Do not pinch hard. A gentle skin fold is enough. A tight pinch can bruise and distort the tissue.
- Insert smoothly, not slowly. A slow, hesitant push causes more tissue drag than a quick, steady insertion.
- Release the skin fold before injecting if your clinician told you to use one, so the medication goes into the fatty layer, not the compressed tissue.
- Hold steady pressure after, no rubbing. Rubbing can cause bruising and push medication into a wider area than intended.
Timing and Temperature
Cold medication often stings more than room-temperature medication. Let your dose sit out briefly if your doctor says it is safe, but never warm it in a microwave or hot water, and never leave insulin in direct sun.
Device-Specific Pain Notes
- Insulin pens: Prime the pen with a 2-unit air shot before each injection. This clears air and confirms the needle is flowing, which prevents a dry, painful stick.
- Syringes: Draw up slowly to avoid air bubbles, and tap the barrel to move bubbles to the top before injecting.
- Pump infusion sets: Insertion devices vary widely. Follow the manufacturer's angle and skin-prep instructions, and rotate the set site every 2 to 3 days to prevent irritation.
- Auto-injectors: These fire quickly and cannot be slowed down. The best pain control is site selection: choose a spot with healthy tissue, avoid lumps and bruises, and let the device sit at room temperature if the label allows.
When Pain Is a Signal, Not a Nuisance
Occasional stinging is normal; sharp, burning, or worsening pain is not. It can mean you are hitting a lump, bruise, or muscle. Move to a fresh spot, check your needle length with your pharmacist, and call your doctor if it continues.
Other ways to cut pain:
- Avoid injecting into a bruise, sore spot, or any area that feels firm or rubbery
- Alternate sides of the body so one side gets a full recovery window
- Keep your supplies at room temperature if the label allows
- Track which spots hurt so you can avoid repeating them
Injection Site Rotation Chart: Building Your Personal Schedule
A rotation chart turns a vague plan into a clear one, whether printed or built in a notebook. Make it specific enough that you never guess where the next shot goes.
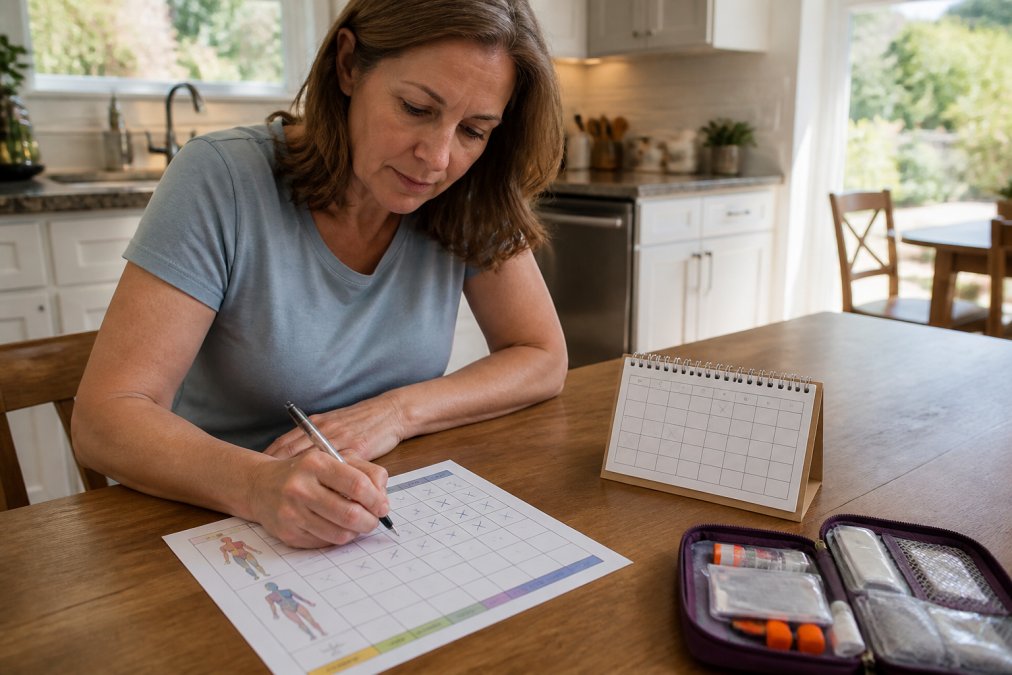
Build a Chart That Matches Your Device
Different devices need slightly different charts, one built for an insulin pen will not map cleanly onto a pump infusion set or GLP-1 auto-injector.
- Insulin pens and syringes: Map the abdomen as four quadrants around the navel, then subdivide each quadrant into a grid of spots spaced at least 1 cm apart. A 4-by-4 grid per quadrant gives you 16 spots per quadrant, or 64 spots in the abdomen alone.
- Pump infusion sets: Rotate between the abdomen, upper buttock, and outer thigh on a 2-to-3-day cycle. Keep a written log of the exact insertion point, because infusion sets stay in longer than a single shot and leave more tissue memory.
- GLP-1 auto-injectors and other single-dose pens: These are usually once weekly, so a simple four-site rotation (left abdomen, right abdomen, left thigh, right thigh) covers a full month. Add upper arm and buttock if someone else can help you inject.
Printable Chart Columns
Build your chart with these columns:
- Date and time of injection
- Device used (pen, syringe, pump set, auto-injector)
- Main body area used
- Specific spot within that area (for example, "abdomen, upper left, outer edge")
- Notes on comfort, bruising, or lumps
Sample Weekly Schedules
A simple once-daily insulin schedule might look like this:
| Day | Area | Spot |
|---|---|---|
| Monday | Abdomen | Upper left, outer |
| Tuesday | Abdomen | Upper left, inner |
| Wednesday | Abdomen | Upper right, outer |
| Thursday | Abdomen | Upper right, inner |
| Friday | Thigh | Outer left |
| Saturday | Thigh | Outer right |
| Sunday | Rest or repeat abdomen | , |
A once-weekly GLP-1 schedule is simpler:
| Week | Area | Spot |
|---|---|---|
| 1 | Abdomen | Left of navel |
| 2 | Abdomen | Right of navel |
| 3 | Thigh | Outer left |
| 4 | Thigh | Outer right |
Make the Chart Work for You
A good chart doubles as a medical record. Bring it to appointments so your doctor or diabetes educator can see your pattern and catch early signs of lipohypertrophy.
Common Mistakes That Undermine Site Rotation
Most rotation problems come from a handful of habits. Fix these and your sites stay healthier.
- Sticking to your favorite spot. It feels easy, so you keep going back. That is how lumps form.
- Skipping the log. If you do not track, you repeat. Memory is not reliable here.
- Moving too small a distance. Spots need at least a centimeter of space.
- Ignoring early lumps. Small changes are easy to miss and easier to fix early.
- Reusing needles. It saves nothing and costs comfort.
- Forgetting to switch main areas. Rotating within one area is not enough over months.
Frequently Asked Questions
How should I rotate my injection sites?
Divide each body area into quadrants and move at least 1 cm (about the width of a pencil eraser) from your last injection. Use a clockwise rotation pattern within one area for a week, then switch to a different area the next week. Keep a written or digital log so you never guess where your last shot went. This systematic pattern gives subcutaneous tissue time to heal and supports consistent absorption of your medication.
What can happen if you don't rotate injection sites?
Repeatedly injecting the same spot causes needle trauma that builds up in the subcutaneous tissue. Over time this leads to lipohypertrophy, which are firm, lumpy patches of fatty tissue. Injecting into these areas changes the absorption rate of your medication, making it unpredictable. You may also notice more skin irritation, bruising, and discomfort with each injection. Rotating sites is one of the simplest ways to protect both comfort and how well your medication works.
How often should I rotate injection sites for insulin or B12?
For daily injections, move to a new spot at least 1 cm away from the previous one every single time. Change the broader body area (abdomen, thigh, upper arm, buttock) roughly once a week so each zone gets rest. If you inject more than once a day, alternate between different quadrants or sides. A rotation schedule that follows this rhythm gives tissue enough recovery time between needle sticks.
What is lipohypertrophy and how can I prevent it?
Lipohypertrophy is a buildup of firm, rubbery fatty tissue that forms when you inject the same spot repeatedly. It can change how your body absorbs medication and make injections less effective. To prevent it, rotate sites systematically, feel your injection areas for lumps before each shot, and avoid any spot that feels hardened or numb. If you find a lump, skip that area entirely until it resolves and mention it to your healthcare provider.
Managing a regular injection routine takes planning, and the supplies matter as much as the schedule. Buy-Otc.com offers discounted B12 shots, B1 and B6 injectables, Vitamin C shots, and needles, all with Geotrust SSL protection for a secure checkout and responsive five-star customer service if something goes wrong with your order. Registered users also get access to discounts and special offers. Get started with Buy-Otc.com and keep your rotation routine stocked and simple.