
 how-to
How to Prepare a B12 Injection at Home Safely
Table of Contents
- What You'll Need Before You Start
- How to Draw B12 From a Vial
- B12 Injection Needle Size: Choosing the Right Gauge and Length
- B12 Injection Site Selection for Self-Administration
- How to Store B12 Vials Correctly
- Safe Disposal of Needles and Sharps
- Common Mistakes and Troubleshooting
- Frequently Asked Questions
Last Updated: September 16, 2026
What You'll Need Before You Start
Preparing a B12 injection at home starts with one hard rule: everything must be clean, in date, and laid out before you touch the vial. This guide covers the full process, from supply checks to sharps disposal.
Gather these supplies on a clean, well-lit surface:
- Alcohol swabs (70% isopropyl)
- Your B12 vial (cyanocobalamin or hydroxocobalamin)
- A new syringe with a luer lock or fixed needle
- A sharps container
- Hand sanitizer or soap and water
- A gauze pad or cotton ball
Gathering Supplies and Checking Expiration Dates
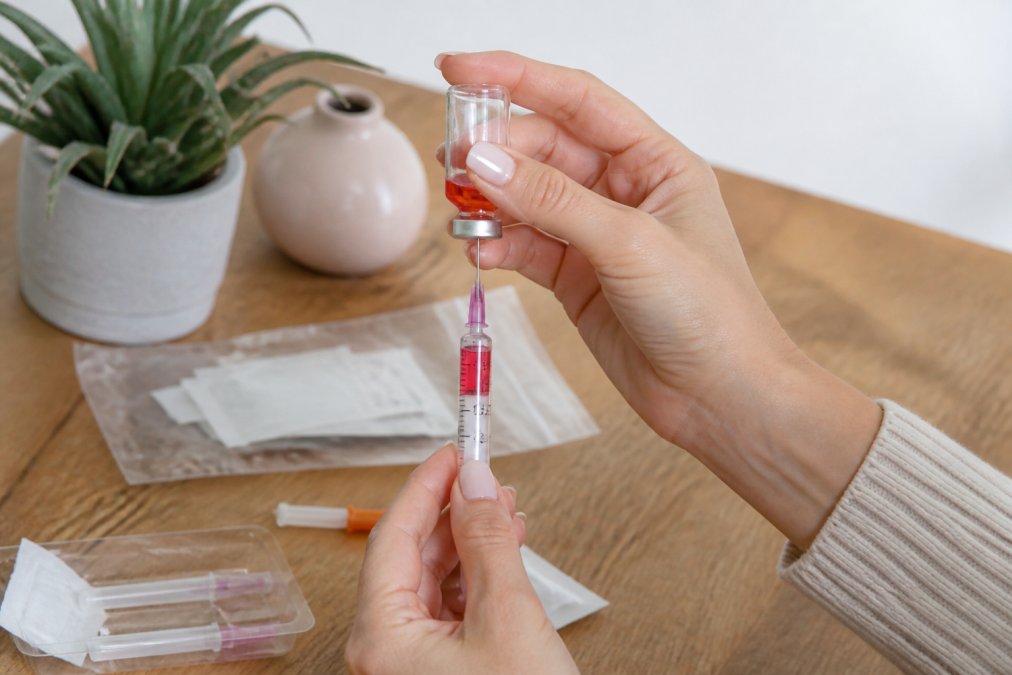
Check the vial's expiration date and inspect the liquid before every dose. Cyanocobalamin should be clear and pink to red; hydroxocobalamin is typically dark red. Cloudiness, particles, or a cracked vial mean you discard it. Never use a vial past its printed date, and never reuse a needle.
How to Draw B12 From a Vial
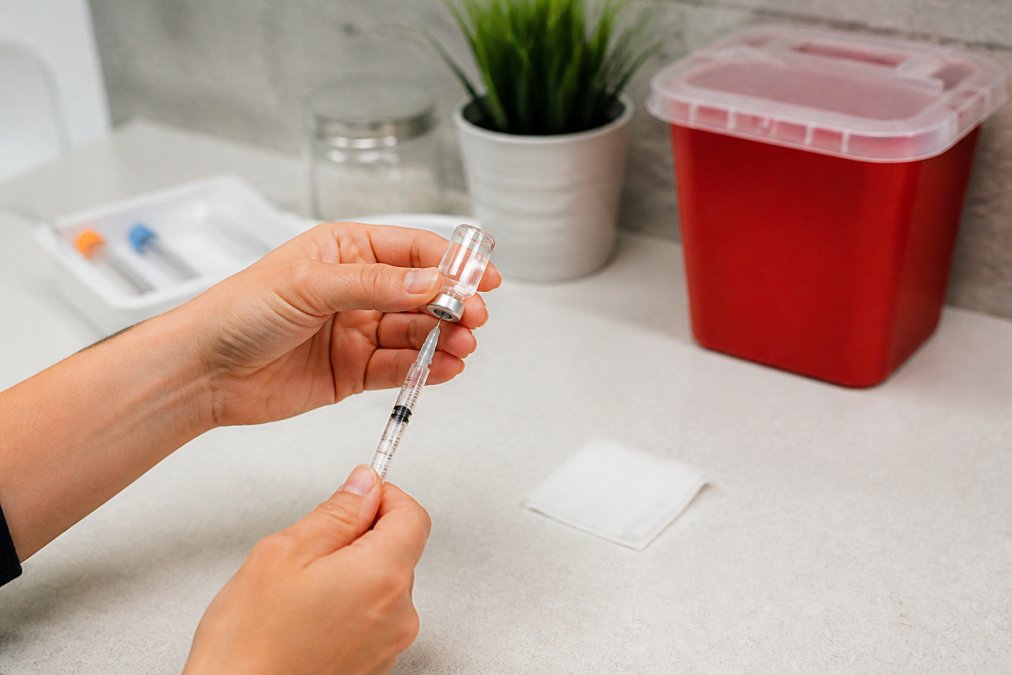
Drawing B12 from a vial means pulling the correct dose into a syringe without contaminating the needle or vial. Done properly, it takes under two minutes.
Step-by-Step: Swabbing, Piercing, and Measuring the Dose
- Wash your hands thoroughly for at least 20 seconds.
- Wipe the vial's rubber stopper with a fresh alcohol swab and let it air dry.
- Remove the needle cap and pull back the plunger to draw air equal to your prescribed dose.
- Insert the needle through the stopper and push the air into the vial.
- Invert the vial and pull the plunger back slowly until the liquid reaches your dose mark.
- Check for air bubbles; tap the syringe and push them back into the vial.
- Withdraw the needle and recap it carefully, or set it down without touching the bevel.
A common mistake is skipping the air-dry step after swabbing. Alcohol left on the stopper gets pulled into the vial and stings on injection.
B12 Injection Needle Size: Choosing the Right Gauge and Length
Needle size comes down to gauge (thickness) and length. For most self-administered B12 injections, a 25G to 30G needle at 5/8 inch to 1 inch works for subcutaneous use; intramuscular injections typically need a longer needle.
| Injection Type | Typical Gauge | Typical Length | Common Site |
|---|---|---|---|
| Subcutaneous | 25G-30G | 5/8 inch | Abdomen, thigh |
| Intramuscular | 22G-25G | 1-1.5 inch | Deltoid, vastus lateralis |
B12 Injection Site Selection for Self-Administration
Injection site selection determines how much the shot hurts, how well the medication absorbs, and whether you build up scar tissue. Subcutaneous injections go into the fatty layer just under the skin, where absorption is slower and steadier; intramuscular injections go deeper into muscle, where blood flow is richer and absorption is faster.
Common self-injection sites include:
- Abdomen (subcutaneous): the fatty area at least two inches from the navel and any surgical scar. It is the easiest site to see and reach, which is why most people start here.
- Anterolateral thigh (subcutaneous or intramuscular): the outer upper thigh, roughly a hand's width below the hip bone and above the knee. The vastus lateralis here is thick enough for intramuscular use and has no major nerves or vessels near the typical injection point.
- Upper outer arm / deltoid (intramuscular): locate the bony point of the shoulder (acromion) and inject about two finger-widths below it in the meatiest part of the muscle. This site usually requires a helper because reaching it one-handed risks a shallow or angled injection.
- Ventrogluteal (intramuscular): the upper outer hip, bounded by the iliac crest, the anterior superior iliac spine, and the greater trochanter. It is one of the safest intramuscular sites because it avoids the sciatic nerve and major blood vessels, but self-administering here is difficult.
Landmarking Each Site Before You Inject
Landmarking means finding bony reference points with your fingers before you swab, so you inject into muscle or fat rather than a nerve, vessel, or joint space. Rules most practitioners teach:
- Abdomen: stay at least two inches from the navel in every direction. The tissue immediately around the navel is thinner and more sensitive.
- Thigh: divide the distance from hip bone to knee into thirds; inject into the middle third on the outer surface, never the inner thigh where the femoral vessels run.
- Deltoid: the injection point sits in the triangle formed by the acromion at the top and the armpit crease at the bottom. Injecting too low risks the radial nerve; too high risks the joint.
- Ventrogluteal: place the heel of your opposite hand on the greater trochanter, point your thumb toward the front of the hip and your index finger toward the back, and inject in the V between them.
Rotating Sites to Prevent Scar Tissue
Rotate your injection site every time. Injecting the same spot repeatedly causes lipohypertrophy, a firm, rubbery lump of fatty scar tissue that absorbs medication unpredictably and makes each injection more painful. Once it forms, that area is permanently off-limits.
What to Avoid at Every Site
- Bruises, scars, moles, and stretch marks: scar tissue and broken skin absorb medication unevenly and raise infection risk.
- Areas with visible veins or a pulse you can feel: these mark vessels you do not want to hit.
- Muscle that is tense or cold: a relaxed muscle accepts the needle more easily and hurts less afterward.
- The same spot two doses in a row: even if it does not hurt yet, the tissue underneath is already being stressed.
If you are unsure whether a site suits your prescribed route, confirm it with your clinician before injecting. Most prescribers will mark the acceptable zones on your skin with a surgical pen so you can replicate them at home.
How to Store B12 Vials Correctly
Store B12 vials according to the label, and when in doubt, refrigerate. Most cyanocobalamin and hydroxocobalamin vials should be kept between 36°F and 46°F, protected from light, and never frozen. Keep the vial in its original carton and away from the refrigerator door where temperature swings.
Safe Disposal of Needles and Sharps
Every used needle goes straight into a sharps container, never the trash. A sharps container is a puncture-resistant, clearly labeled bin for used needles, syringes, and lancets.
Common Mistakes and Troubleshooting
Most problems at home come from technique, not the medication. What separates a manageable hiccup from a medical emergency is knowing what to do in the first sixty seconds.
Pain During the Injection
A sharp sting as the needle enters is normal. A burning or aching sensation that builds as you push the plunger usually means the medication is cold, the needle is dull, or you are injecting into tense muscle.
- Cold liquid: let the vial sit in your hand for two to three minutes before drawing. Do not microwave it, run it under hot water, or leave it in direct sun, heat degrades cyanocobalamin and hydroxocobalamin.
- Dull needle: a needle that has already pierced the vial stopper is slightly blunted. If you drew the dose more than a few minutes ago or had to re-pierce the stopper, start with a fresh needle for the injection.
- Tense muscle: take a slow breath and consciously relax the limb before inserting. Injecting into a clenched muscle hurts more and can push medication back out.
Bruising, Bleeding, or a Hematoma
A small bruise after an injection is common and harmless, caused by the needle nicking a small capillary on the way in or out.
- Minor bleeding: press a clean gauze pad over the site for 30 to 60 seconds without rubbing. Rubbing spreads the bruise.
- A growing, firm, painful lump (hematoma): apply a cold pack wrapped in a cloth for 10 to 15 minutes, several times over the first day. Do not massage it. If it keeps growing or the pain is severe, contact your clinician.
- Bleeding that will not stop after several minutes of firm pressure: this is unusual for a subcutaneous or intramuscular injection and warrants a call to your clinician, especially if you take a blood thinner.
Hitting a Blood Vessel
If you pull back the plunger before injecting and see blood enter the syringe, you have entered a vessel. Withdraw the needle, discard it in the sharps container, apply pressure for a minute, and start over with a fresh needle and a new dose. Do not inject the blood-tinged medication.
Medication Leaking Back Out
A bead of liquid at the injection site usually means the needle was too shallow, you withdrew too quickly, or you did not leave the needle in long enough after pushing the plunger.
- Confirm the needle length matches your prescribed route, 5/8 inch for subcutaneous, 1 to 1.5 inches for intramuscular.
- After the plunger is fully depressed, hold the needle in place for a slow count of ten before withdrawing.
- Withdraw at the same angle you inserted, in one smooth motion.
Air Bubbles in the Syringe
Small bubbles are common and, in a subcutaneous or intramuscular injection, not dangerous, but they make it hard to measure an accurate dose. Tap the syringe so bubbles rise to the top, then push the plunger gently until they return to the vial. If bubbles persist, you may be drawing too fast; pull the plunger back slowly and let the vial's vacuum do the work.
Feeling Faint, Dizzy, or Anxious
Needle anxiety is common and manageable, and it is why many people put off starting therapy. A few things that help:
- Sit down for every injection. Never inject standing.
- Take four or five slow breaths before inserting the needle, and look away if watching makes it worse.
- Have a glass of water and a snack nearby in case you feel lightheaded afterward.
- If you have fainted from a needle before, ask someone to be in the room for your first few doses.
Signs of an Allergic Reaction
Most reactions at the injection site, redness, warmth, or itching, are mild and fade within a day. Seek emergency care immediately if you experience any of the following after an injection:
- Hives spreading beyond the injection site
- Swelling of the lips, tongue, or throat
- Wheezing, difficulty breathing, or a tight feeling in the chest
- A rapid heartbeat, sudden widespread flushing, or a feeling of impending doom
When to Stop and Call Your Clinician
- Redness, swelling, or pain at an injection site that worsens after 24 hours rather than improving
- A fever, chills, or pus at the site, which can signal infection
- A firm lump that does not go away, which may be lipohypertrophy
- Numbness or tingling in the limb you injected, which can indicate nerve irritation
- New or worsening symptoms of B12 deficiency despite regular injections
For supplies and secure checkout, Buy-Otc.com stocks B12 shots, B1 injections, B6 injectable, vitamin C shots, and needles at discounted prices, with SSL-protected ordering and responsive customer service if an order arrives damaged. Registered users also get ongoing discounts and special offers.
Frequently Asked Questions
What happens if you inject B12 incorrectly?
Injecting incorrectly can cause bruising, pain, or infection at the site. Always use sterile technique and seek medical help if you experience severe pain, swelling, or signs of an allergic reaction.
How far do you put the needle in for a B12 shot?
For an intramuscular injection, insert the needle at a 90-degree angle until it reaches the muscle. A 1 to 1.5 inch needle is typical for adults. For subcutaneous injections, use a shorter needle at a 45-degree angle. Your healthcare provider can tell you the exact depth based on your body type and injection site.
How do I properly dispose of used needles and syringes?
Place used needles and syringes immediately into a FDA-cleared sharps container. Do not recap, bend, or break needles. When the container is three-quarters full, seal it and follow your local health department guidelines for disposal. Many pharmacies and community health centers accept full sharps containers for safe disposal.
What are the best sites for self-administering a B12 injection?
Common sites for self-injection include the vastus lateralis (outer thigh) and the ventrogluteal area (upper outer buttock). The deltoid (upper arm) is also common but harder to reach yourself. Rotate sites to prevent scar tissue and always clean the area with an alcohol swab before injecting.
Preparing a B12 injection at home is a skill, and like any skill it rewards consistency: clean hands, a fresh needle, a rotated site, and proper disposal every single time. If you are ready to stock up on injectables and needles without paying pharmacy-counter prices, Buy-Otc.com offers a secure, straightforward way to order. Get started with Buy-Otc.com and keep your routine supplied with confidence.